

这篇文章源于一个问题:
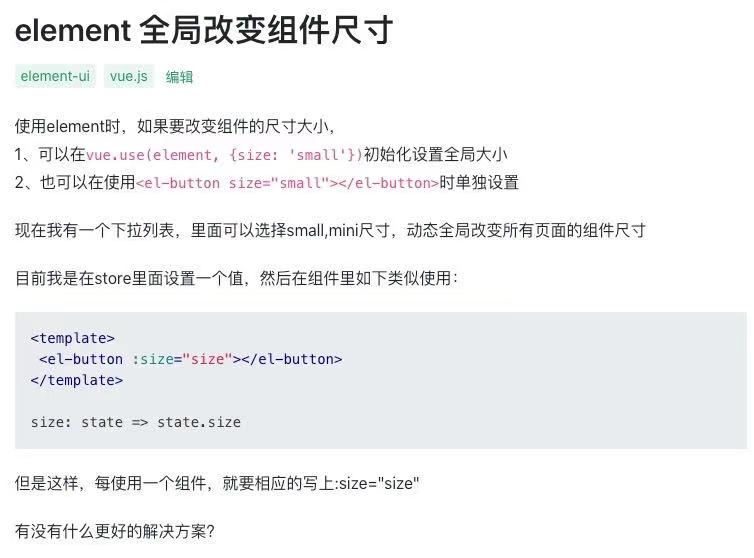
如何更改尺寸?
我看了只有一个回答,貌似答的也不对,下面说一下我的答案,其实是 vue-element-admin 的实现方案:
在 Vue 项目入口文件中:
Vue.use(Element, {
  size: Cookies.get('size') || 'medium', // 设置默认和刷新浏览器设置为你指定的大小
  locale: enLang, // 如果使用中文,无需设置,请删除
})
更改组件尺寸的事件:
methods:{
    handleSetSize(size) {
      this.$ELEMENT.size = size  // 这一步很关键,这是 Element-UI 向 Vue 暴露的实例属性,下面会源码分析
      this.$store.dispatch('app/setSize', size) // 这里就是把尺寸写入 cookie :Cookies.set('size', size),供页面刷新时使用
      this.refreshView() // 主要为了及时当前页面生效,这个刷新单页应用的方案值得学习,下面也会分析源码
      this.$message({
        message: 'Switch Size Success',
        type: 'success',
      })
    },
    refreshView() {
      // In order to make the cached page re-rendered
      this.$store.dispatch('tagsView/delAllCachedViews', this.$route)

      const { fullPath } = this.$route
      // 这里使用 nextTick 是为了确保上面的 dispatch 里 promise 异步清除的任务完成
      this.$nextTick(() => {
        this.$router.replace({
          path: '/redirect' + fullPath,
        })
      })
    },
}
redirect 路由定义以及对应的组件:
{
    path: '/redirect',
    component: Layout,
    hidden: true,
    children: [
      {
        path: '/redirect/:path(.*)', // 这里是重点,见下图路由前后对比
        component: () => import('@/views/backup/redirect/index'),
      },
    ],
  },


ELement-UI 里组件是如何使用 $ELEMENT.size 的?
以 Button 组件为例(只展示关键代码):